Introduction
As an avid fisher, you’ll appreciate the need to get your lure at the right depth. This version of a homemade downrigger does without the reel too, by using a planer line of a fixed length which is secured directly to a stern mooring cleat. But homemade downrigger could be costly. Fortunately, you can build a down rigger at home with a few simple tools and a touch of ingenuity. Not only will you save money, but building a custom down rigger will allow you to have a better understanding of this essential fishing component. This guide by Home Business Fig, walks you through using materials with which you can build a working downrigger designed to fish fish at predetermined depths. Fishing on either a boat, or ship, this will really help you when it comes to getting that next big catch.
Understanding the Basics of Homemade Downriggers
What is a Downrigger?
What Is A Downrigger? A downrigger is a piece of fishing equipment designed to lower and keep your bait or lure at a given depth in the water. Now, with this device, fishermen can focus on the fish at different levels deeper down the waters. Knowing the basic basis and process of a downrigger will allow it to become an effective homemade version.
Key Components
If you have a homemade downrigger you want to build at home, you have to learn about the necessary components of a downrigger.
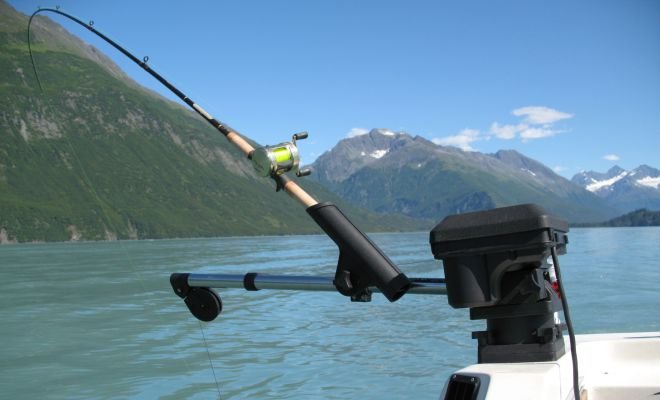
- Boom: The arm I am holding on to that extends from the boat to hold the line
- The Reel: Where the cable comes from and where it goes
- Weight: Maintains the line at the appropriate depth
- Release mechanism: Unhooks the fishing line when a fish bites
Operating Principles
A downrigger drops a heavy weight into the water and drags your fishing line to whatever depth you want. Once a fish bites the bait, the release mechanism detaches your line from the downrigger so that you can reel in your catch without interference. This technical system allows you to achieve strong deep-water control and is sure to increase your odds of reeling in those tricky deep-water fish.
Essential Components for Building Your Own Downrigger
The Core Elements
To create a homemade downrigger, you need a few basic components. At the core of your setup, you require a solid base plate that serves as the foundation for the whole mechanism. This foundation would need to be constructed from tough materials such as marine-grade aluminum or stainless steel for long-term use in harsh marine environments. At the back of this base, a strong boom arm acts as the rod, extending your fishing line from your boat.
Crucial Mechanical Parts
All downriggers have a core component of a reel and spool assembly. This system controls the amount you let out, and when you pull your line back in. If cheating is easier, this is the horizontal position and subsequent horizontal orientation. Another important feature is a weight release mechanism, to let go of your fishing line once a fish bites. Finally, be sure to check the best counter for measuring the depth of your weight.
Additional Accessories
Optionally, if you are looking for better functionality, you can also add a swivel mount mechanism for better reach and you can add a brake system for controlling descent speed. For trolling, a rod holder attachment can also be indispensable, providing a place to secure your fishing rod.
Step-by-Step Guide to Constructing a Homemade Downrigger
Gather Materials
Start with the basics: a base plate with a structural frame to hold a spool of line, a boom arm and a weight release. You will also need some stainless steel hardware, a hand crank and heavy fishing line. For tools: drill, wrench and pliers.
Assemble the Base
Begin with the base plate, which attaches the downrigger to your boat. Complete the drill holes for the spool and the boom arm. And mount the spool securely, and that it spins freely. Then mount the boom arm at 45 degrees for the best performance.
Install the Release Mechanism
That release mechanism is vital for getting your fishing line off of the tether. Fix it to the back end of the boom arm such that it is easy to reach and works reliably. The final build should be thoroughly tested before moving on to step 4.
Finishing Touches
Install the hand crank to the spool so you can crank in the line. Pass your chosen fishing line through the system — spool to release mechanism. Always check that everything works before you take your new-cheap downrigger out on the water.
Conclusion
DIY Downriggers: You’ve seen how building your own homemade downrigger is a rewarding project and one that will take your fishing experience to the next level. Building your own low-cost equivalent to a commercial-grade tool is completely achievable by following the steps in this guide. Keep safety and durability in mind in your design and material choices. Now, with your DIY downrigger, you can get to those deep-water fish that are just out of reach. Whether you’re an experienced angler or a beginner, this DIY method provides customization options to fit your needs. So You gather up Your required material, read the instructions step by step, and get ready to catch downrigger for Yourself.